With summer approaching, it's time that I break out my skirts. And, one of my very favorite skirts is my turquoise ruffled linen skirt from Eddie Bauer. I love the flowing skirts since it gets pretty hot and humid here in Kentucky during the summer months. Have you seen the cute bright linen ones at
Gap right now? I am hoping (fingers crossed) I can make a similar one. But, since I don't have the Gap skirt in my hands right now, I thought I would make one identical (or pretty darn close) to my Eddie Bauer skirt. I love how it turned out. Although, I might need to make it just a tad bit smaller. I took pictures in the process in case you wanted to make one of your own. You know this is easy, so make one and let me know how it turns out. These measurements fit me (just a little loosely) and I am an 8,10,12 in clothing. Isn't that funny how I can be all three. Let me explain by saying this skirt is identical in size to my Eddie Bauer skirt which is an 8, but it really could really be a size 10 or 12 because it is adjustable and because it is a little big. I think I will make some more and take 2 inches off each layer and see how it fits, but in the mean time-
You will need:
*2 yards of light linen or very light weight fabric cut in to these measurements:
(2) 23" wide X 10 1/2" tall - waist and 1st tier
(2) 40" wide X 6" tall - 2nd tier
(2) 45" wide X 6" tall - 3rd tier
(2) 50" wide X 6" tall - 4th tier
(1) 60" wide X 1 1/2" tall - drawstring
(1) small square of light weight iron on interfacing
*1/2 inch elastic that measures around your waist plus 2 inches
*coordinating thread
All seams are 1/2 inch unless otherwise noted

1 - Cut fabric to measurements above.


2 - Sew all strips of fabric in to tubes. That means, sew the 2 - 23" X 10 1/2" pieces at each end, right sides together so that it ends up being one big tube. Then, continue doing that for the next 3 tiers (example: sew together the 40" X 6" piece on each end right sides together and so forth).

3 - They will look like this when you are done. You will now have 4 tubes of fabric in graduating sizes. If not using a serger, it is a good idea to cut the side seams down to 1/4" and zig zag stitch down the sides to prevent fraying.

 4 - Take the second tube (not the one for the waist, but the second one measuring 40" X 6") and make a long running stitch 1/4" down from the top. Leave long threads on each end to pull so that you can make a ruffle. Pull the threads gently to ruffle and shorten to fit the waist band.
 5 - Sew the 2nd tier (the ruffled one) to the bottom of the 1st tier (the waist band) right sides together at the bottom. If not using a serger, zig zag the seam when done.
 6 - It will look like this.

7 - Now gather the 3rd tier by doing a long stitch at the top 1/4" down. Pull this ruffle loosely to fit the width of the 2nd tier. Attach the 3rd tier to the 2nd tier, right sides together. Zig zag seam when finished. It will look like this.

8 - Attach the 4th tier the same way and then your skirt will look like this.


9 - Finish the hem at the bottom by ironing 1/2 inch over on the wrong side and then again up to the ironed line making a double folded hem that will be 1/4 inch when sewn. Or if you have a serger, serge the bottom and then fold up 1/2 inch and sew close to the edge.

 10 - For the waist band, iron over 1 1/4" and then 1/4" from the top to make a casing that will be 1". If using a serger, serge the top edge and then iron over 1". Find the center of the front of the skirt. The front can be either side since the skirt is symmetrical. Mine fell at 11 1/2". Mark with a soluble marker 1/4" down from the ironed fold line. Now, mark 1/2" to the right of that mark and 1/2" to the left of that mark. These will be the tops of the button holes.
 11 - Iron the square piece of light weight interfacing over the dots you just marked. You will still be able to see the marks in order to line up your button holes.
 12 - Using an automatic button hole stitch, sew two button holes that will fit a 3/8" button. Carefully use a seam ripper to open up the button holes.
 13 - Now sew the casing. The button holes should fall centered on the front of the casing on the right side of the skirt. Sew all the way around with an 1/8" seam leaving 1 1/2" open to run elastic through.
 14 - Measure the 1/2" elastic around your waist plus 2" and cut. The elastic will be more loose than snug so that it will stay up with the elastic, but you can use the drawstring to tighten the skirt around your waist. Using a safety pin, run the elastic through the opening in the casing.

15 - Over lap the elastic 1" and sew together. Sew up the opening in the casing.


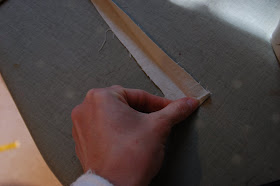
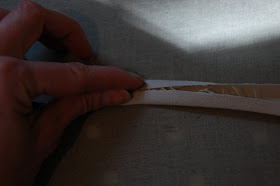
 16 - Now we need to make the drawstring. Iron the 60" X 1 1/2" piece of linen in half. Now, iron each edge to meet that ironed line in the middle. Iron 1/4" on each end and sew each end and down the long side along the edge - about 1/8".

 17 - Put a safety pin through the end of the drawstring and run it through one button hole all the way around, coming out the end of the other button hole. Tie knots in each end of the drawstring and you are DONE!!!
18 - Now order more linen (or find some at your fabric store) in lots of colors and make more skirts!


 and, at 6 3/8" for the right note cards like in this photo:

